C++Guns – RoboBlog blogging the bot

26.03.2012

Faster 64Bit C Code - Part1

Filed under: Allgemein — Tags: , , , — Thomas @ 21:03

Auf 64Bit Plattformen ist in der Regel ein Int 32Bit groß. Macht man damit Pointerarithmetik muss die 32Bit Zahl erst zu eine 64Bit zahl convertiert werden, bevor sie verrechnet wird. Pointer sind auf 64Bit Plattformen auch 64Bit groß.

Durch den Einsatz von size_t statt int und ptrdiff_t statt int* lässt sich das verhindern. Siehe http://www.viva64.com/en/a/0050/

Ich habe mit Valgrind mir die Anzahl der Instrktionen für die Testfunktion geben lassen und es stimmt. Es werden für dieses
Beispiel nur noch 5 statt 4 Instruktionen für ein Array Element benötigt.

Hier mein Testprogramm:

#include < iostream >
#include < stdlib.h >

void func(size_t arraySize, float array[] ) {
  for (size_t i = 0; i < arraySize / 2; i++)
  {
    float value = array[i];
    array[i] = array[arraySize - i - 1];
    array[arraySize - i - 1] = value;
  }
}

int main(int argc, char **argv) {
        unsigned int n = atoi(argv[1]);
        std::cout << n << std::endl;
        float *arr = new float[n];

        func(n, arr);

        std::cout << "ausgabe " << arr[0] << std::endl;
        delete[] arr;
        return 0;
}

g++ -O2  -Wall object.cpp
valgrind --tool=callgrind   --collect-systime=yes --callgrind-out-file=unsignedint.out ./a.out 100000000
callgrind_annotate unsignedint.out |grep func

array           Instruction count
lenght     unsigned int        size_t

1*10^8    500,000,007         400,000,007 
1*10^7     50,000,007          40,000,007
1*10^6      5,000,007           4,000,007  
1*10^5        500,007             400,007
1*10^4         50,007              40,007
1*10^3          5,007               4,007

06.09.2011

example to change the base instance of a derived object

Filed under: Allgemein — Tags: , , — Thomas @ 15:09

Man hat ein Array von Objekten einer abgeleiteten Klasse.
Da new[] nur den Default Konstruktor aufruft, kann man keine schon existierende Instanz der Basisklasse mitgeben.
Folgender Code zeigt, wie man die Basisinstnaz nachträglich ändern kann.


// example to change the base instance of a derived object
#include < iostream >
using namespace std;

class rawData
{
public:
double x;
};

class extendedData : public rawData
{
public:
int a;
};

int main ()
{
rawData *knoten = new rawData[2];
knoten[0].x = 0;

extendedData *knotenext = new extendedData[2];
knotenext[0].x = 1;
knotenext[0].a = 10;

cout << knotenext[0].x << endl; cout << knotenext[0].a << endl; // do the magic rawData *base = &knotenext[0]; *base = knoten[0]; cout << knotenext[0].x << endl; cout << knotenext[0].a << endl; delete[] knoten; delete[] knotenext; return 0; }

Ausgabe:

1
10
0
10

Valgrind:

kater@mintux:~$ valgrind ./a.out --leak-check=full
==7218== Memcheck, a memory error detector.
==7218== Copyright (C) 2002-2007, and GNU GPL'd, by Julian Seward et al.
==7218== Using LibVEX rev 1854, a library for dynamic binary translation.
==7218== Copyright (C) 2004-2007, and GNU GPL'd, by OpenWorks LLP.
==7218== Using valgrind-3.3.1-Debian, a dynamic binary instrumentation framework.
==7218== Copyright (C) 2000-2007, and GNU GPL'd, by Julian Seward et al.
==7218== For more details, rerun with: -v
==7218==
1
10
0
10
==7218==
==7218== ERROR SUMMARY: 0 errors from 0 contexts (suppressed: 18 from 1)
==7218== malloc/free: in use at exit: 0 bytes in 0 blocks.
==7218== malloc/free: 2 allocs, 2 frees, 40 bytes allocated.
==7218== For counts of detected errors, rerun with: -v
==7218== All heap blocks were freed -- no leaks are possible.

Eigentlich hätte ich erwartet, dass man das alte Basisobjekt noch löschen muss. Aber anscheinend nicht :)

07.08.2011

hex to int - 1 Byte

Filed under: Allgemein — Tags: — Thomas @ 10:08

uint8_t hex2int(char str[2])
{
for(uint8_t i=0;i<2;i++) { if(str[i] <= '9') str[i] -= 48; else if(str[i] <= 'F') str[i] -= 55; else if(str[i] <= 'f') str[i] -= 87; } return (str[0]<<4)+str[1]; }

04.04.2011

Etwas über C, Assember und Performance

Filed under: Allgemein — Tags: , — Thomas @ 21:04

Angenommen, ihr habt folgenden Code

int main()
{

  int i = 0;
  for(; i < 255; i++)
  {
    if(i != 10)
      printf("a");
    else
      printf("b");
  }

  return 0;
}

Angenommen, man ändert if(i != 10) zu if(i == 10). Läuft der Code schneller? Bei diesem Beispiel: Nein.

Ich habe mir den erzeugten ASM Code ausgeben lassen (--save-temps) und die Anzahl der Vergleiche und Sprünge verglichen. Beide male jeweils zwei. Schaltet man nun die Compileroptimierung ein (-O3), ändert sich der Code gewaltig. Es gibt nun ein Vergleich und ein Sprung für den Fall wenn die Variable i gleich 10 ist und zwei Vergleiche und ein Sprung wenn sie ungleich 10 ist. Ändert man den Code nun entsprechend, bleibt das Ergebnis gleich.

Wer es nicht glaub kann ja gern selbst den ASM Code sich anschauen ;) Das gilt aber nur für exakt dieses Beispiel. Schaltet man nun irgendwelche andere Optimierungen ein, oder benutzt Arrays statt der Laufvariable i, sieht alles wieder anders aus.

Interessant wäre es mal selbst Assembler Code zu schreiben der diese Aufgabe mit möglichst wenig Vergleiche und Sprünge in der Summe über die gesamte Laufzeit bewältigt.

11.03.2011

Servocontroller

Filed under: Allgemein — Tags: , , , — Thomas @ 21:03

Mein Servocontroller ist online. Mehr zu lesen gibts hier
Servocontroller

25.02.2011

Datenhandschuh: Die Verbindung mit dem PC steht

Filed under: Allgemein — Tags: , , , — Thomas @ 13:02

Heute habe ich den Operationsverstärker an einem Mikrocontroller angeschlossen, der das Signal an den PC schickt. Damit sind drei, einzel entwickelte Komponenten miteinander verbunden. Und es funktioniert zufriedenstellend :)

Der Mikrocontroller, ein alter ATmega8, besitzt ein 10bit ADC mit interner 2.56V Referenzspannung. Neuere Typen kommen auch bis auf 1.1V runter. Aber für den Prototyp lange das erstmal. Allerdings musste ich den Transimpedanzverstärker weiter aufbohren, damit er eine Ausgangsspannug von ca. 2.5V erreicht. Aber selbst mit 6MOhm im Gegenkopplungszweig habe ich eigentlich keine Probleme mit Rauschen. Als OP ist der CA3240 eingebaut.

datenhandschuh_verstaerker2

Das Programm für den Controller war schnell geschrieben. Da gibt es nicht viel zu sagen.

Den Logarithmus ziehe ich jetzt am PC. Mit den Operationsverstärker hat das nicht so richtig geklappt. Man bekommt ja nur 60mV/Dekate. Und auf noch einen dritten Verstärker in der Kette habe ich keine Lust.

14.02.2011

OpenCV death (hot) Pixel im Bild entfernen

Filed under: Allgemein — Tags: , — Thomas @ 14:02

Da meine ca. 11 Jahre alte Webcam mitlerweile ein paar kaputte Pixel hat, die einfach nur weiß sind, habe ich mir überlegt was man dagegen tun kann. Eine Möglichkeit wäre, die Pixel zu erkennen und durch den Median der umliegenden Pixel zu ersetzten.

Um die Pixel zu erkennen macht man einfach ein paar Aufnahmen im dunkeln (oder hält die Hand vor die Kamera). Die kaputten Pixel heben sich deutlich vom Mittelwert ab. Anschliessend kann man das Bild binarisieren. Eine brauchbare Schwelle ist Mittelwert + 3 * Standardabweichung. Dann kommen wirklich nur Ausreisser durch. Anschliessend werden diese Pixel im original Bild durch ihren Median ersetzt.

Die Umsetzung in OpenCV ist etwas eklig. Es müssen mehrere Zwischenbilder erstellt werden. Und vorallem akzeptiert die Filterfunktion keine Masken. Es kann also nur auf das gesammte Bild der Median angewand werden. Wenn man aber anschliessend alle nicht-kaputten Pixel wieder zurück kopiert, ist das Resulatat das selbe.

hotPixelRemoval

Code gibts leider keinen, weil zu unschön von mir umgesetzt. Werde mich demnächst mal mit OpenCV Version 2 beschäftigen. In der Hoffnung, dass man dort das ganze schöner umsetzten kann.

27.01.2011

OpenCV Mittelwert der Farben in einem Video

Filed under: Allgemein — Tags: , — Thomas @ 01:01

Schaut euch mal dieses geniale Video an
http://www.youtube.com/watch?v=NtoYuwmTzt0

Wird das Video nicht zwischendrin irgendwie blasser? Es kommt mir gerade so vor. Hmmm man könnte ja mal die Farben analysieren. Also jedes einzelne Frame in den HSV (H Farbwert, S Sättigung, V Wert) umrechnen, den Mittelwert über alle Pixel bilden und dann grafisch auftragen.

Gesagt, getan.

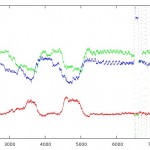
mittelwertfarbe

Auf der X-Achse ist die Framenummer aufgetragen. Auf der Y-Achse HSV. Die rote Kurve ist H, grün S und blau V.
Man kann deutlich den Vor- und Abspann erkennen. Sonst bleiben die Werte relativ gleich. Die Kamera bewegt sich aber auch nicht.
Aber drei mal geht die Sättigung runter. Das Bild wird blass und bläulicher. Wie vermutet :)

Schön sind auch noch die ganzen Sprünge zu erkennen, wenn das Bild schnell ein und ausgeblendet wird.

Und hier mein quick&dirty Programm. Habe mplayer genutzt um an die einzelnen Frames zu kommen, da openCV Version 1 so sein Probleme mit Linux und avi hat.

mplayer ../Equilibrium\ -\ Unbesiegt\ Piano\ Cover.flv -vo jpeg -ao null

#include < stdio.h >
#include < stdlib.h >

#include < cv.h >
#include < highgui.h >

#define getPixel(img,x,y) (((uchar*)(img->imageData + img->widthStep*(y)))[x])
#define putPixel(img,x,y,color) (((uchar*)(img->imageData + img->widthStep*(y)))[x] = color)

#define getPixelB(img,x,y) (((uchar*)(img->imageData + img->widthStep*(y)))[x*3])
#define putPixelB(img,x,y,color) (((uchar*)(img->imageData + img->widthStep*(y)))[x*3] = color)

#define getPixelG(img,x,y) (((uchar*)(img->imageData + img->widthStep*(y)))[(x)*3+1])
#define putPixelG(img,x,y,color) (((uchar*)(img->imageData + img->widthStep*(y))) [(x)*3+1] = color)

#define getPixelR(img,x,y) (((uchar*)(img->imageData + img->widthStep*(y)))[(x)*3+2])
#define putPixelR(img,x,y,color) (((uchar*)(img->imageData + img->widthStep*(y)))[(x)*3+2] = color)

using namespace std;

int main()
{
char filename[18] ;
IplImage *image = 0;
IplImage* hsv = 0;
cvNamedWindow("original",1);

int i = 1;
snprintf(filename, 18,"jpg/%08d.jpg",i++);
image = cvLoadImage(filename);
hsv = cvCreateImage( cvGetSize(image), IPL_DEPTH_8U, 3 );

IplImage* h_plane = cvCreateImage( cvGetSize( image ), 8, 1 );
IplImage* s_plane = cvCreateImage( cvGetSize( image ), 8, 1 );
IplImage* v_plane = cvCreateImage( cvGetSize( image ), 8, 1 );

cvCvtPixToPlane( hsv, h_plane, s_plane, v_plane, 0 );

while(1)
{
snprintf(filename, 18,"jpg/%08d.jpg",i++);

image = cvLoadImage(filename);
if(image == 0)
break;

cvCvtColor( image, hsv, CV_BGR2HSV );
cvCvtPixToPlane( hsv, h_plane, s_plane, v_plane, 0 );

float meanh = 0, means = 0, meanv = 0;
for(int y = 0; y < hsv->height; y++)
{
for(int x = 0; x < hsv->width; x++)
{
meanh += getPixel(h_plane, x, y);
means += getPixel(s_plane, x, y);
meanv += getPixel(v_plane, x, y);
}
}
meanh /= image->width * image->height;
means /= image->width * image->height;
meanv /= image->width * image->height;

printf("%f %f %f\n", meanh, means, meanv);

cvShowImage("original", image);

cvWaitKey(10);

cvReleaseImage(&image);

}
}

Wer gern den QtCreator benutzt, hier noch mein .pro File.

SOURCES += main.cpp

INCLUDEPATH += /usr/include/opencv
CONFIG += link_pkgconfig
PKGCONFIG += opencv

Und hier mal ein "normales" Video
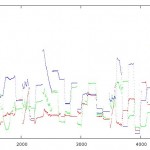
mittelwertfarbe2

20.01.2011

C freien Speicher ermitteln

Filed under: Allgemein — Tags: — Thomas @ 13:01

Das Zauberwort heisst sysinfo.

// Um den freien RAM zu bestimmen
#include < sys/sysinfo.h >

struct sysinfo meminfo;
if(sysinfo(&meminfo) != 0)
perror("Kann keine RAM Infos auslesen");

printf("mem total %i\n" ,meminfo.totalram/1024/1024);

free memory usage

10.12.2010

C/C++ eine static Variable liegt im Heap

Filed under: Allgemein — Tags: , — Thomas @ 16:12

Eine statische Variable liegt im Heap, statt auf dem Stack. Das erklärt auch, warum das Programm meines Chefs funktionierte, nachdem er vorsorgshalber alle 200 Variablen im Datapool als static deklarierte. Der Stack ist nur einige MB groß (Wie groß genau? Infos suchen!). Fordert man ein entsprechend großes Array an, stürzt das Programm ab.

Gefunden im Buch "Multicore Programmierung" von Intel. Seite 154 ganz Oben.
ISBN 978-3939084-70-9

Im Regelfall sind Variablen, die auf dem Stack deklariert wurden, privat; aber das C/C++ Schlüsselwirt static sorgt dafür, dass die Variable auf dem globalen Heap abgelegt werden und so für alle OpenMP-Schleifen sichbar sind

Noch mehr Infos hab ich hier gefundn http://stackoverflow.com/questions/408670/stack-static-and-heap-in-c

Summary of what static, heap, and stack memory are:

  • A static variable is basically a global variable, even if you cannot access it globally. Usually there is an address for it that is in the executable itself. There is only one copy for the entire program. No matter how many times you go into a function call (or class) (and in how many threads!) the variable is referring to the same memory location.
  • The heap is a bunch of memory that can be used dynamically. If you want 4kb for an object then the dynamic allocator will look through its list of free space in the heap, pick out a 4kb chunk, and give it to you. Generally, the dynamic memory allocator (malloc, new, et c.) starts at the end of memory and works backwards.
  • Explaining how a stack grows and shrinks is a bit outside the scope of this answer, but suffice to say you always add and remove from the end only. Stacks usually start high and grow down to lower addresses. You run out of memory when the stack meets the dynamic allocator somewhere in the middle (but refer to physical versus virtual memory and fragmentation). Multiple threads will require multiple stacks (the process generally reserves a minimum size for the stack).
  • When you would want to use each one:

  • Statics/globals are useful for memory that you know you will always need and you know that you don't ever want to deallocate. (By the way, embedded environments may be thought of as having only static memory... the stack and heap are part of a known address space shared by a third memory type: the program code. Programs will often do dynamic allocation out of their static memory when they need things like linked lists. But regardless, the static memory itself (the buffer) is not itself "allocated", but rather other objects are allocated out of the memory held by the buffer for this purpose. You can do this in non-embedded as well, and console games will frequently eschew the built in dynamic memory mechanisms in favor of tightly controlling the allocation process by using buffers of preset sizes for all allocations.)
  • Stack variables are useful for when you know that as long as the function is in scope (on the stack somewhere), you will want the variables to remain. Stacks are nice for variables that you need for the code where they are located, but which isn't needed outside that code. They are also really nice for when you are accessing a resource, like a file, and want the resource to automatically go away when you leave that code.
  • Heap allocations (dynamically allocated memory) is useful when you want to be more flexible than the above. Frequently, a function gets called to respond to an event (the user clicks the "create box" button). The proper response may require allocating a new object (a new Box object) that should stick around long after the function is exited, so it can't be on the stack. But you don't know how many boxes you would want at the start of the program, so it can't be a static.
  • « Newer PostsOlder Posts »

    Powered by WordPress